A factory reset alone does not permanently erase your data. Recovery software can retrieve files after a standard reset. For permanent erasure before selling, use Univik File Eraser to securely wipe files, folders, free disk space, and browser traces using military-grade overwrite standards (DoD 5220.22-M, Gutmann 35-pass). After wiping, perform a factory reset to reinstall Windows for the new owner. This two-step approach ensures your personal data is unrecoverable while leaving the laptop ready to use.
Introduction
You have backed up your files, bought a new machine, and listed the old laptop for sale. Before you hand it over, there is one critical step: making sure the next owner cannot access your personal data. This is not paranoia. Basic data recovery software is free, easy to use and can retrieve files from a factory-reset laptop in minutes.
This guide explains why standard deletion methods leave data recoverable, walks through a complete pre-sale checklist, and covers three methods for permanently erasing data: secure file wiping with Univik File Eraser, Windows “Reset this PC” with the clean-drive option, and macOS disk erasure. We also cover the important differences between erasing HDDs and SSDs.
Why Deleting Files and Factory Reset aren’t Enough
When you delete a file normally (even from the Recycle Bin), Windows removes the pointer to that file in the file system table. The actual data remains on the disk until another file happens to overwrite that exact location. Until then, recovery software can find and restore the “deleted” file with its full contents intact.
A factory reset (Settings > System > Recovery > Reset this PC > Remove Everything) goes further by removing your user account, applications, and settings. However, the default “Just remove my files” option still only deletes file references. The slower “Clean the drive” option is better but not equivalent to a dedicated wiping tool. It performs a single-pass overwrite, which may leave traces recoverable by advanced forensic tools.
Formatting a drive has the same limitation. A quick format clears the file table without touching the data itself. Even a full format (which does a single-pass overwrite on modern Windows) may not meet the security standards needed when your laptop contains financial records, passwords, personal photos, or business documents.
What Data You Need to Erase
Your laptop likely contains more sensitive data than you realize. Beyond your obvious documents and photos, consider these often-overlooked locations where personal information hides.
Saved passwords and auto-fill data. Browsers store login credentials, credit card numbers, and address auto-fill data in local databases. Even after signing out of a browser, this data persists on disk.
Browser history and cookies. Your browsing history, search queries, and tracking cookies reveal detailed patterns about your online activity, financial accounts, and personal interests.
Email client data. If you used Outlook, Thunderbird, or another desktop email client, your entire mailbox (including attachments) may be stored in local PST, MBOX, or profile files.
Application caches and temp files. Chat applications (Teams, Slack, Discord), cloud sync folders, and office applications leave cached files, thumbnails, and temporary copies across multiple locations.
Windows pagefile and hibernation file. Windows swaps memory contents to disk in pagefile.sys and hiberfil.sys. These files can contain fragments of anything you had open: documents, passwords, clipboard contents, and encryption keys.
Before You Wipe: Backup and Sign-Out Checklist
Back up everything you need. Copy important files to an external drive or cloud storage. Once you wipe the laptop, there is no recovery. Verify the backup by opening a few files from the backup location before proceeding.
Sign out of all accounts. Log out of Microsoft Account, Google, iCloud, Adobe, Spotify, and any other services. Deauthorize any software that uses device-based licensing (e.g., Microsoft Office, Adobe Creative Cloud).
Disable Find My Device. On Windows, go to Settings > Privacy & Security > Find My Device and turn it off. On Mac, disable Find My Mac in System Settings > Apple Account > iCloud. If you skip this step, the new owner may be locked out by Activation Lock.
Unlink the laptop from your Microsoft or Apple account. Visit account.microsoft.com/devices or appleid.apple.com and remove the device from your account. This prevents the device from appearing in your account after the sale.
Note your Windows product key. If you plan to provide the new owner with a clean Windows installation, ensure the product key is embedded in the BIOS (most modern laptops) or note it separately. The new owner will need it to activate Windows after a reinstall.
Method 1: Secure File Wiping with Univik File Eraser
Best for: Users who want selective or complete data wiping with military-grade overwrite standards before performing a factory reset.
Univik File Eraser provides secure data erasure that goes beyond simple deletion. It overwrites file contents with multiple passes of random data patterns, making recovery impossible even with professional forensic tools.
Step 1: Install and open Univik File Eraser. The application displays a dashboard with wiping options: Wipe Files/Folders, Wipe Free Space, Wipe Drive and Clean System Traces.
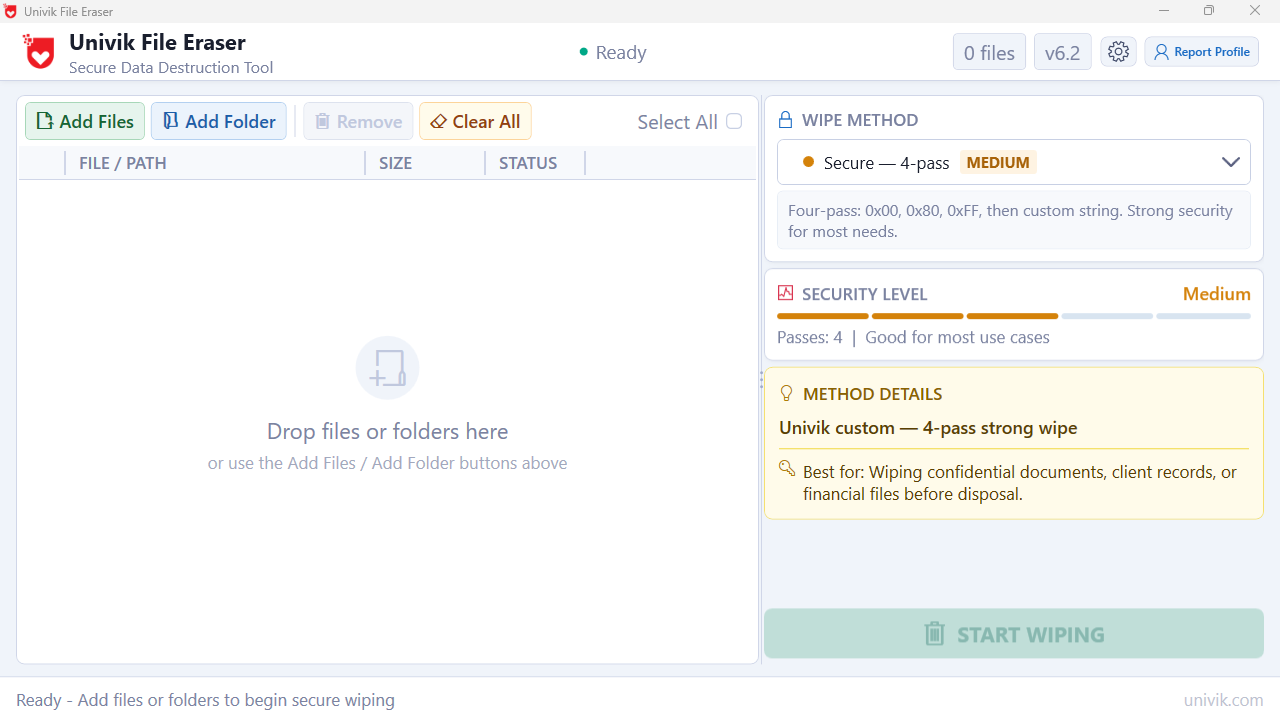
Univik File Eraser
Step 2: Select the wiping method. Choose from industry-standard erasure algorithms. The DoD 5220.22-M method (3 passes) is sufficient for personal use. For maximum security, the Gutmann method (35 passes) overwrites data with carefully designed patterns that defeat even magnetic force microscope analysis. For SSDs, a single-pass random overwrite is recommended (multi-pass provides no additional security benefit on flash storage due to how SSDs handle writes internally).
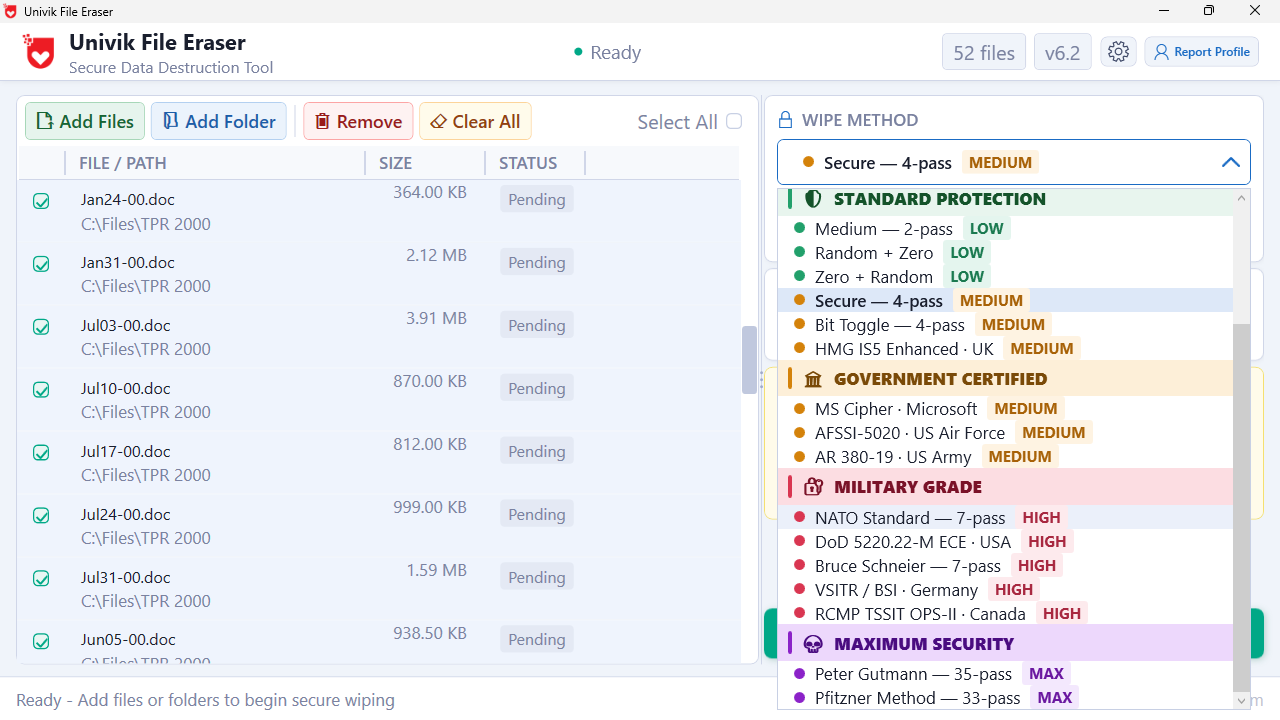
File Erase Methods
Step 3: Wipe your personal data. You can wipe selectively (specific files, folders, or file types) or wipe the entire drive. For pre-sale preparation, the recommended approach is to first use “Clean System Traces” to erase browser data, temp files, recent file lists, cookies, and application caches. Then use “Wipe Free Space” to overwrite all previously deleted data that still resides on the disk. This combination eliminates both visible and hidden data remnants.
Step 4: Perform a factory reset. After Univik File Eraser has wiped your data, go to Settings > System > Recovery > Reset this PC and choose “Remove everything”. This reinstalls Windows cleanly for the new owner. Because the underlying data was already overwritten by Univik File Eraser, the reset is now genuinely clean rather than superficially clean.
Method 2: Windows Reset with Clean the Drive
Best for: Users who want a built-in solution without additional software.
Windows 10 and 11 offer a two-tier reset. Go to Settings > System > Recovery > Reset this PC > Get Started. Choose “Remove everything”. On the next screen, select “Clean the drive” (not “Just remove my files”). This option overwrites your data with zeros, which takes several hours depending on drive size.
Windows will warn that this process takes a long time. For a 500 GB hard drive, expect 2-4 hours. For a 1 TB drive, it may take 6-8 hours. Keep the laptop plugged into power throughout the process. After completion, Windows reinstalls and the laptop boots to the initial setup screen, ready for the new owner.
This method is adequate for most personal sales. However, it performs only a single-pass overwrite, which falls below the DoD and NIST standards that dedicated wiping tools provide. If your laptop contained highly sensitive business data, financial records, or medical information, a multi-pass overwrite with a tool like Univik File Eraser provides stronger assurance.
Method 3: macOS Erase and Reinstall
Best for: MacBook and iMac users.
Apple Silicon Macs (M1/M2/M3/M4): Go to System Settings > General > Transfer or Reset > Erase All Content and Settings. Enter your password. The Mac erases everything, removes the Apple Account link, and restarts to the setup screen. Apple Silicon Macs use hardware-level encryption, so “erasing” actually destroys the encryption key, making the data instantly unreadable even without overwriting every sector.
Intel-based Macs: Restart and hold Command + R to enter macOS Recovery. Open Disk Utility. Select “Macintosh HD” and click Erase. Choose APFS format. After erasing, return to the Recovery menu and choose “Reinstall macOS”. The Mac reinstalls a clean OS for the new owner.
For Intel Macs with standard (non-T2 chip) SSDs, Disk Utility offers a “Security Options” slider during erasure. Setting it to the most secure option performs multiple overwrites. Macs with T2 security chips handle encryption similarly to Apple Silicon, where destroying the encryption key is sufficient.
HDD vs SSD: Why Erasing Works Differently
| Feature | HDD (Hard Disk Drive) | SSD (Solid State Drive) |
|---|---|---|
| How data is stored | Magnetic platters | Flash memory cells (NAND) |
| Overwrite effectiveness | Very effective (data written to exact physical location) | Less predictable (wear leveling moves data between cells) |
| Recommended wipe method | Multi-pass overwrite (DoD 5220.22-M) | ATA Secure Erase command or manufacturer tool |
| Multi-pass benefit | Yes (increases security with each pass) | Minimal (one pass is sufficient for flash storage) |
| TRIM command | Not applicable | Marks cells as available, may partially erase data |
| Encryption-based erasure | Rarely supported | Supported on self-encrypting drives (destroy key = erase) |
For HDDs, traditional multi-pass overwriting is the gold standard. The physical nature of magnetic storage means that overwritten data is genuinely destroyed. For SSDs, wear-leveling algorithms distribute writes across cells to extend drive life, which means an overwrite may not reach every cell containing old data. The most effective SSD erasure uses the ATA Secure Erase command (supported by most SSD manufacturers’ tools) or encryption-based erasure. Univik File Eraser’s free space wiping combined with Windows’ built-in TRIM support provides effective SSD sanitization for personal-sale scenarios.
How to Verify Your Data Is Actually Gone
After wiping, you can verify the erasure by running a data recovery tool yourself. Free tools like Recuva or TestDisk can scan the drive for recoverable files. If the scan returns no readable files (or only fragments of unidentifiable data), the wipe was successful.
For business or compliance scenarios, Univik File Eraser generates a wiping report that documents which files were overwritten, which erasure standard was used, and whether the process completed successfully. This report serves as proof of data destruction for audit and compliance purposes (GDPR, HIPAA, PCI DSS).
Frequently Asked Questions
Is a factory reset enough before selling my laptop?
A factory reset with the default “Just remove my files” option is not enough. The “Clean the drive” option provides a single-pass overwrite that is adequate for casual sales. For laptops that contained sensitive data, a multi-pass wipe with dedicated software before the factory reset provides stronger protection against recovery.
How long does it take to securely wipe a laptop?
A single-pass wipe of a 500 GB HDD takes approximately 1-2 hours. A 3-pass DoD wipe takes 3-6 hours. A 35-pass Gutmann wipe can take 24+ hours on large drives. SSDs are significantly faster because flash storage handles writes differently. Plan to leave the laptop plugged in and running overnight for thorough wiping.
Should I physically destroy the hard drive instead?
Physical destruction (drilling holes, degaussing, shredding) is the most absolute method, but it makes the laptop unsellable since it no longer has a storage drive. If you plan to sell the laptop intact, software-based wiping is the right approach. If you are recycling or disposing of the laptop and do not care about resale value, removing and destroying the drive is an option.
Do I need to reinstall Windows after wiping?
If you used “Wipe Free Space” or selective file wiping, Windows remains intact and you can then perform a factory reset. If you wiped the entire drive, you will need Windows installation media and a valid product key to reinstall. Most modern laptops have the product key embedded in the BIOS, so Windows activates automatically during reinstall.
Does encryption replace the need for wiping?
BitLocker (Windows) and FileVault (Mac) encrypt your entire drive. If encryption was enabled before you stored any data, destroying the encryption key (by resetting the device) makes the data unreadable without overwriting it. However, if encryption was enabled after data was already stored, unencrypted remnants may still exist on the drive. For maximum certainty, wipe first, then reset.
Conclusion
Last verified: February 2026. Tested on Windows 11 24H2, Windows 10 22H2, and macOS Sequoia. Secure erasure tested with Univik File Eraser using DoD 5220.22-M and Gutmann methods on both HDD and SSD laptops. Recovery verification performed with Recuva and TestDisk.
Selling a laptop without properly erasing your data is like handing someone the keys to your digital life. The safest pre-sale workflow is: back up your files, sign out of all accounts, disable Find My Device, wipe your data with Univik File Eraser (paying special attention to free space and system traces), then perform a factory reset to leave a clean Windows installation for the new owner. This two-step process ensures that your personal data is permanently destroyed while the laptop remains fully functional for its next owner.
The minimum you should do: Windows Reset with “Clean the drive” (Settings > System > Recovery > Remove everything > Clean the drive). The best you can do: Univik File Eraser to wipe free space and system traces with a multi-pass overwrite, followed by a factory reset. For Macs, use Erase All Content and Settings (Apple Silicon) or Disk Utility erase (Intel Macs) from Recovery mode.
