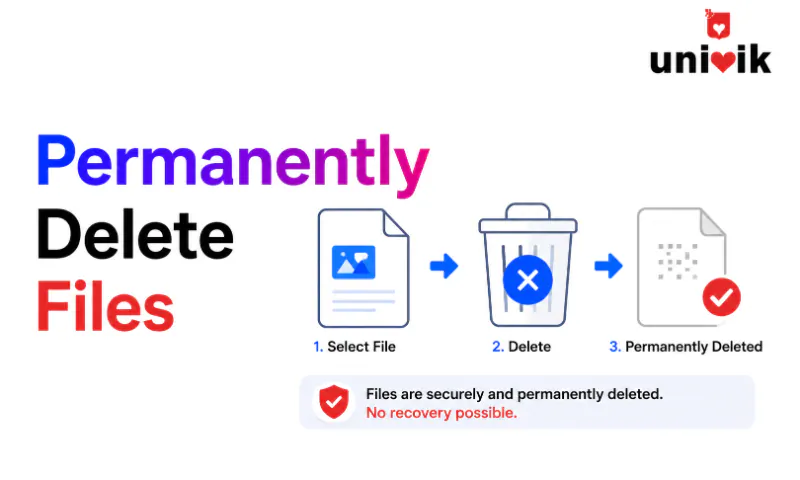
To permanently delete a file you have to overwrite its data on the drive. Every normal method, the Delete key, Shift+Delete and emptying the Recycle Bin, removes only the reference to the file and leaves the data itself recoverable. To securely delete files without recovery, open Univik File Eraser, add the files, pick an erasure standard such as DoD 5220.22-M and start. The data sectors are overwritten and no recovery tool can bring the files back. For files you already deleted the normal way, run Wipe Free Space on the drive instead.
There is no way to permanently delete a file with the tools that ship with Windows or macOS. The Delete key, Shift+Delete, emptying the Recycle Bin and emptying the Trash all do the same thing. They remove the directory entry that points to the file and leave the data itself sitting on the drive, where free recovery software finds it in minutes.
Permanent deletion means overwriting the physical locations where the file’s data lives. We build data erasure and forensics tools at Univik and have tested recovery against every deletion method Windows and macOS offer since 2013, on both spinning drives and SSDs. This guide covers four ways to securely delete files on a PC or Mac, from the simplest software route to command line options, and shows how to verify the result with the same recovery tools an attacker would use.
Why Deleting a file does not Permanently Remove It
When you delete a file, the operating system removes its entry from the file system table, the NTFS Master File Table on Windows or the APFS catalog on Mac. The file’s data stays in the same physical sectors. Recovery software skips the table entirely, scans the sectors directly and finds your deleted files intact. Our test of this is repeatable on any machine, and our guide on whether deleted files can be recovered walks through it with real scan results.
This applies to every standard method. The Delete key moves the file to the Recycle Bin, where nothing is deleted at all. Shift+Delete skips the bin but still removes only the table entry. Emptying the bin does the same. Even a quick format rebuilds the file table without touching the data sectors. The Permanently delete option in File Explorer and the PowerShell Remove-Item command sound stronger and do the same thing, skip the bin and drop the entry. None of these overwrites a single byte of the file’s content, which is why none of them counts as permanent.

“Our test for a permanent delete is a recovery attempt on the same disk afterwards, run for every method, on drives as small as 250 GB and as large as 24 TB. If the recovery tool finds nothing, the method passed. That is the only test that means anything.”
Nick Rogers
|Founder, Univik, building file conversion tools since 2013
How to Permanently Delete files on a Windows PC
The direct way to permanently delete files from a computer is software that overwrites the target files and then removes their entries. Tools built for this are called file shredders. Univik File Eraser does exactly that on any Windows PC.
- Open Univik File Eraser and select the Wipe Files and Folders mode.
- Add the files or folders you want to destroy. Drag them into the window or use the Add Files and Add Folders buttons.
- Choose the erasure standard. DoD 5220.22-M with three passes suits most situations. A single pass of random data stops every known recovery tool. Gutmann with 35 passes exists for maximum theoretical assurance.
- Click Start. The software overwrites each file’s data sectors with the chosen pattern, verifies the overwrite, then removes the file entry.
After the run, recovery tools find overwrite patterns where the file used to be. Nothing readable comes back. This is the method for destroying sensitive files as you finish with them, tax returns after filing, client documents after a project closes or a password list you replaced. Which situations call for which method comes down to one question.
Securely Delete files with the Windows Command Line
Windows ships one relevant command, and it comes with a catch. The cipher command overwrites free space but cannot target a specific file. Per Microsoft’s cipher documentation, the /w switch removes data from unused disk space on the volume. So the sequence is delete the file normally first, then run the command on that drive.
cipher /w:C:\path\to\folder
This makes three passes over the free space, zeros, then ones, then random data. It works without installing anything, which is its whole appeal on a locked down machine. The trade is speed and precision. It grinds through all free space rather than one file, takes hours on a large drive and produces no report you could show an auditor. Dedicated software overwrites the target file’s own sectors before removal, which is the more reliable order of operations.
How to Permanently Erase files you already Deleted
If you deleted sensitive files through the Recycle Bin months ago, those files are still on the drive right now. You cannot point Wipe Files at them because their entries no longer exist. The fix is to overwrite the free space where they live.
In Univik File Eraser, select the Wipe Free Space mode, choose the drive, pick a standard and start. The software overwrites every sector the file system marks as free, which is exactly where deleted files sit. Your current files and the operating system are untouched. One run permanently removes every file you have ever deleted on that drive, documents, photos, downloads and temporary files together. Our guide on wiping free space without reinstalling Windows covers this operation in more depth, including how long to expect it to run.
The cipher route works here too. An elevated Command Prompt and cipher /w:C:\ overwrites the free space on the C: drive in three passes. Slower, no report, but no installation.
How to Permanently Delete files on Mac
macOS removed its secure deletion tools years ago. Secure Empty Trash left in OS X El Capitan, and the srm command followed in macOS Sierra. The secure flag on the rm command survives in the manual only as a note that it no longer does anything. Apple’s position is that FileVault encryption and SSD TRIM make file level overwriting unnecessary, which holds for a stolen laptop but not for every situation, such as handing over a machine with the password. There is a file system reason behind the removal too. APFS uses a copy on write design that commits changes to fresh blocks instead of the originals, so a tool that overwrites a file in place never touches the blocks where the old data actually sits.
What works on a modern Mac depends on the hardware. Macs with a T2 chip or Apple Silicon encrypt the drive in hardware. Erase All Content and Settings destroys the encryption key, which makes everything on the drive unreadable at once. That is the right tool for selling the machine and useless for destroying one file while keeping the rest. For single files on a Mac, a dedicated erasure tool is the practical route. To compare the leading tools, see our roundup of the best data erasure software. Univik File Eraser is Windows software, so on a Mac it reaches only external or shared drives in FAT32 or exFAT through a Windows machine or virtual machine.
Older Intel Macs with a spinning drive and no T2 chip have a Terminal option. The diskutil command still erases free space with a chosen number of passes, which handles previously deleted files the same way Wipe Free Space does on Windows.
Which Erasure Standard to Choose (DoD vs NIST vs Gutmann)
Every secure deletion tool asks you to pick a standard, which is really a choice of how many overwrite passes to run. More passes take longer and add documentation value rather than practical security. A single pass of random data already defeats every known recovery tool.
| Scenario | Standard | Passes | Time (1 GB file) |
|---|---|---|---|
| Personal files, photos and documents | Random data | 1 | ~30 seconds |
| Financial records and tax documents | DoD 5220.22-M | 3 | ~90 seconds |
| Client data and business contracts | DoD 5220.22-M | 3 | ~90 seconds |
| Healthcare records under HIPAA | NIST 800-88 Purge | 1 + verify | ~45 seconds |
| Government classified data | DoD 5220.22-M ECE | 7 | ~3.5 minutes |
| Maximum theoretical assurance | Gutmann | 35 | ~17 minutes |
The three pass DoD 5220.22-M standard is the sensible default. It is fast enough for everyday use and widely recognised in compliance contexts. The seven and 35 pass options exist for policy requirements, not because anyone recovers data through a single overwrite. On SSDs the guidance changes. NIST SP 800-88, the media sanitization standard this field runs on, treats a single pass as sufficient for flash storage because SSDs do not retain the residual magnetic patterns that motivated multi pass schemes on spinning drives. The same standard defines three sanitization tiers, Clear, Purge and Destroy, and reserves physical destruction of the media for the most extreme threat models. Overwriting covers everything short of that.
Files you should always Delete Permanently
Financial documents top the list. Tax returns, bank statements and credit card statements carry enough for identity theft, so shred them digitally when you no longer need them. Stored card data adds PCI DSS on top, which requires secure deletion of cardholder data once its retention period ends. Our guide on permanently deleting old tax returns covers retention periods and the destruction step together.
Medical records sit under HIPAA in the US and GDPR in the EU, and a recovered lab result from a discarded drive is a breach with fines attached. Password files and credential lists are high value even when stale, since old passwords reveal the patterns behind current ones. Client contracts, invoices and correspondence create liability if they surface from a stolen or resold drive. And private photos deserve the same treatment, since normal deletion leaves them open to anyone with physical access, a risk our guide on permanently deleting photos walks through for phones and computers both.
One honest limit applies to all of it. Overwriting destroys the copy on that drive and nothing else. A file synced to OneDrive, attached to a sent email or sitting in a backup survives the erase, so track down the copies before you call the data gone.
How to Verify Deleted files are truly Gone
Trust the result you can test. After a secure deletion, run the same recovery software an attacker would use against the location. Recuva is free and PhotoRec is open source. Run a deep scan of the folder or drive where the files lived.
A correct erase produces one of two results. The scan finds nothing at all, or it finds fragments of random and zero data that no tool can assemble into a readable file. If the scan returns intact files with recognisable names and content, the overwrite missed those sectors and you run the process again. Univik File Eraser builds this check in. After overwriting, it reads the sectors back to confirm the original data is gone, and the completion report documents both the overwrite and the verification, which serves as proof of destruction in a compliance file.
Frequently Asked Questions
Does putting a file in the Recycle Bin permanently delete it?
No. The Recycle Bin does not delete anything. It moves the file to a holding folder where it stays fully intact until you empty the bin, and even emptying only removes the file’s directory entry. The data stays on the drive and recovery software reads it back. Permanent deletion starts where the Recycle Bin ends, with an overwrite of the data itself.
Does Shift+Delete permanently erase a file?
No. Shift+Delete skips the Recycle Bin but still only removes the file’s entry from the file system table. The data stays in its sectors, fully recoverable with free software. It behaves exactly like emptying the Recycle Bin, just in one step instead of two.
Can I permanently delete files on an SSD?
Yes. SSDs handle writes differently because of wear leveling, but a secure overwrite combined with the drive’s TRIM command removes the data effectively. NIST SP 800-88 treats a single overwrite pass as sufficient for flash storage. Our guide on securely erasing an SSD covers the drive level options too.
How long does permanently deleting files take?
A single pass runs at roughly the drive’s write speed, 100-500 MB/s on SSDs and 80-160 MB/s on spinning drives. A 1 GB file takes about 30 seconds with one pass or 90 seconds with the three pass DoD standard. Wiping the free space on a 500 GB drive runs 1-4 hours depending on the method and the amount of free space.
Can I permanently delete files without installing software?
Partly. On Windows, delete the files normally and then run cipher /w: on the drive, which overwrites the free space in three passes. It cannot target one file and it takes hours on a big drive, but it needs no installation. Dedicated erasure software stays faster and more precise because it overwrites the specific file before removing it.
Should I permanently delete files before selling my computer?
Yes. Run Wipe Free Space to destroy everything you deleted over the machine’s life, clear browser data and system traces, then do the factory reset. A reset alone rebuilds the system without overwriting your old data. Our guide on erasing data before selling a laptop puts the full sequence in order.
The Bottom Line
Deletion hides files. Overwriting destroys them. Every built in method on Windows and Mac stops at hiding, which is why recovery software works so well and why permanent deletion needs a deliberate overwrite step.
Start with one operation. Run Wipe Free Space on your main drive to destroy every file you have ever deleted the normal way. From then on, erase sensitive files through Wipe Files as you finish with them and let the verification report be your proof. Test the result with a recovery scan once, watch it come back empty and you will never wonder again whether deleted means gone.