A custom cursor is your own picture saved as a .cur, a small see through image with one marked pixel, the hotspot, that decides where a click actually lands. Make the picture, convert it to the cursor format and point your mouse settings at the file. The Univik ICO Converter turns a PNG, JPG or SVG into a .cur cursor in one step and keeps the transparency.
Turning a favourite picture into your mouse pointer is a small joy, and it is easier than it looks. The picture part takes minutes. The part that trips people up is the click point, the exact pixel Windows treats as the tip of your cursor.
This guide walks the whole path. Getting your image ready, turning it into a real cursor file, landing the click point where it belongs and pointing Windows at your creation.
What Turns an Image into a Cursor
A picture and a cursor look like the same thing on screen, yet a cursor carries two things a plain image does not. Miss either and Windows either refuses the file or draws it wrong.
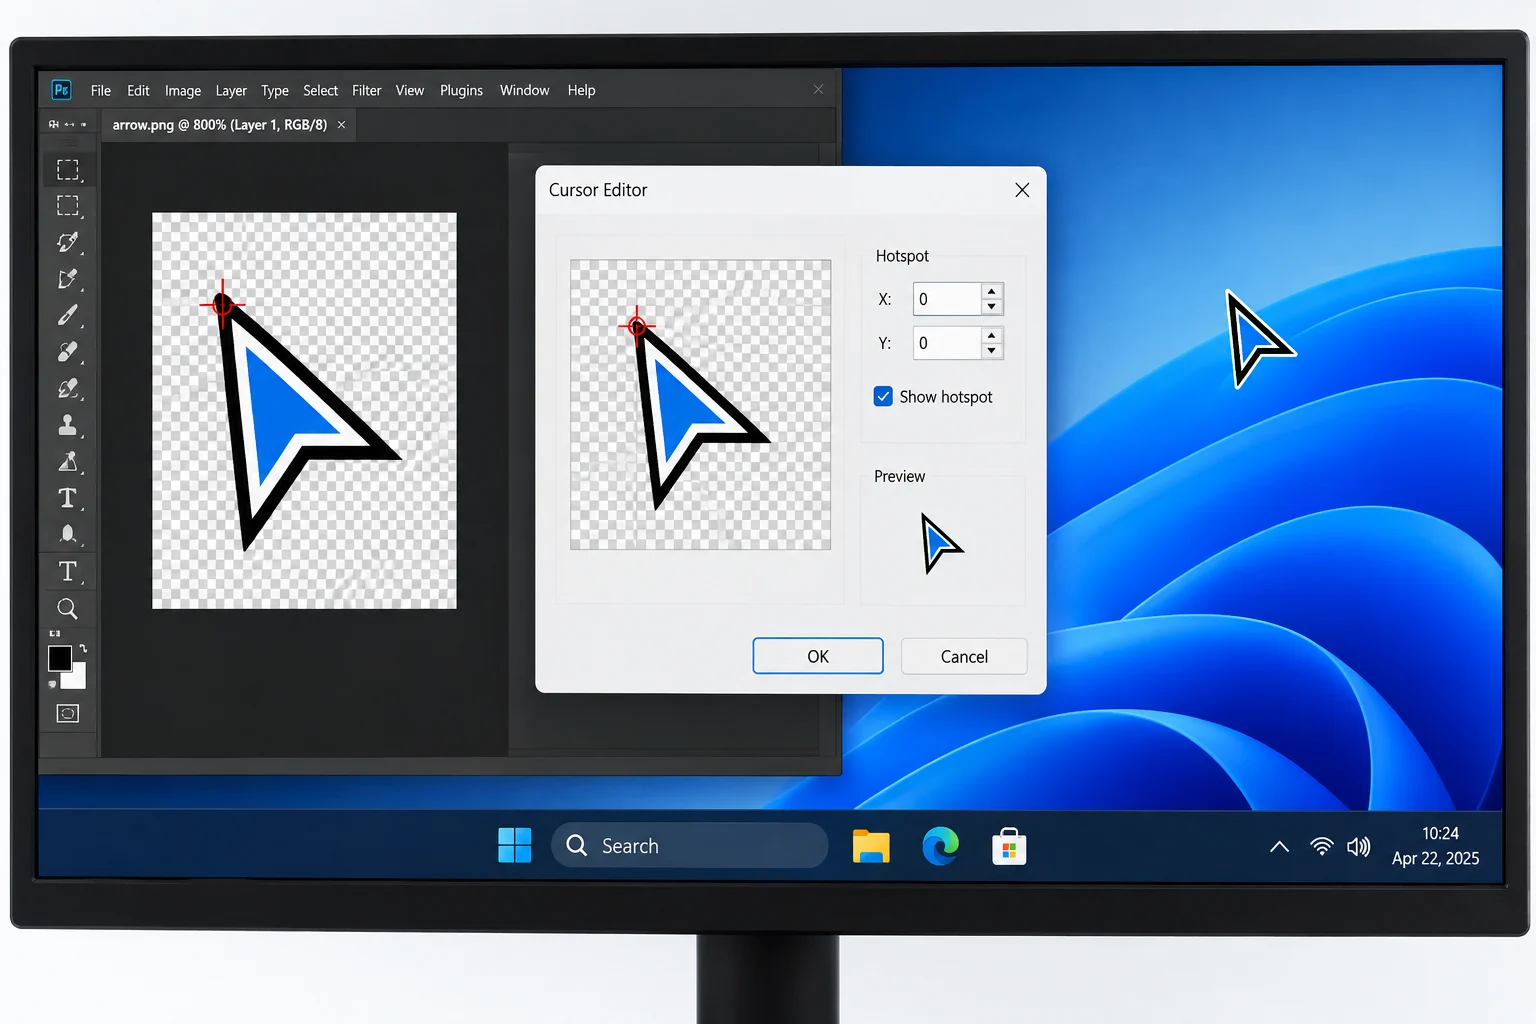
The file itself is a .cur, which shares its whole layout with an icon and adds that click point. The full anatomy of the format, and what the click point does once Windows loads it, sits on the CUR file guide. Here the job is building one from a picture you already have.
Prepare Your Image First
Good cursors start with the right source. A phone photo of your dog will not shrink into a crisp pointer, but a clean logo or a bold simple drawing will. Three checks before you convert anything.
Save the result as a PNG. That format holds an alpha channel, which is the see through layer a cursor leans on, and it is the cleanest thing to feed a converter. An SVG works too and has an edge worth knowing about, covered further down.
Turn Your Image into a Cursor File
With a clean square PNG ready, the conversion is the quick part. The Univik ICO Converter reads your image and writes it out in the cursor format, transparency and all.
- Load your imageOpen the converter and drop in your PNG, JPG or SVG using Create ICO from Image.
- Choose the sizesPick 32 for the classic pointer and add a larger size like 128 or 256 so it stays sharp on a high resolution screen.
- Export as CURSet the output to CUR. The app turns the image into a usable Windows cursor and keeps every clear pixel clear.
- Keep the fileYou now have a .cur ready to hand to Windows, which the next sections walk through.
Want to check the result before you use it? The free ICO viewer opens a .cur in the browser so you can see each size at true scale first. Under the hood a cursor is icon shaped, so the same image to icon conversion that builds an ICO is what builds your cursor, one corner of the wider map of where Windows keeps its icons.
Drop in a PNG, JPG or SVG, pick the sizes and export a clean .cur with the transparency intact, ready to set as your Windows pointer.
Free Download See All FeaturesGet the Click Point Right
Here is the part most cursor guides skip and the reason a homemade pointer can feel broken. Every cursor has a single pixel, the hotspot, that Windows treats as the real tip. Move your mouse and that one pixel is what hovers, clicks and drags. Microsoft's own notes on cursors put it plainly, an arrow points from its tip and a crosshair points from its centre.
A plain image carries no such pixel, so a new cursor gets a default one, dropped in a corner. If your design points from that corner, the way the standard Windows arrow points from its top left, the default is already right and you are done.
For a design that clicks from anywhere but that corner, you place the pixel yourself in a dedicated cursor editor, which lets you click the exact spot and see the coordinate update. Starting instead from an existing cursor keeps its click point, since the converter carries a hotspot straight through when your source is already a cursor.
One Cursor for Every Screen Size
A cursor built at a single small size looks fuzzy the moment it lands on a sharp display. The old standard was 32 pixels square, fine on the monitors of the day, rough on a modern high resolution panel that wants to draw the pointer bigger.
The fix is the same trick an icon uses. One cursor file can hold the same picture at several sizes at once, and Windows reaches for whichever fits the screen and the pointer size a person has chosen. Build in 32, then 48 and 64, then a large 128 or 256 for the sharpest displays.
Design your art at the biggest size first and let the converter build the smaller frames down from it. Going the other way, blowing a tiny image up, only spreads the blur.
Point Windows at Your New Cursor
Windows does not install a cursor the way it installs an app. You hand it the file. Open your mouse settings and find the Pointers tab. Choose the pointer you are swapping out, then browse to your .cur. Microsoft's guide to mouse settings lists the exact clicks for that dialog.
A .cur is not an installer. Double clicking it does nothing useful. Point at it through the Browse button in your mouse settings instead. To make the change survive a restart and to swap a whole matching set of pointers together, the full walkthrough sits on the CUR file guide.
Free Ways to Make a Cursor
Making your own cursor need not cost anything, and it is worth knowing the trade offs of each route before you pick one.
- Online converters. Sites that turn a PNG into a .cur are quick, but they upload your image to a server you do not control, and the good ones that let you set a click point are the exception.
- A dedicated cursor editor. Free editors exist that draw a cursor pixel by pixel and let you click to place the hotspot exactly. RealWorld Cursor Editor is one long running example. The trade is a steeper tool for a simple job.
- The offline route. The Univik ICO Converter runs on your PC so nothing leaves it, opens on a free demo and turns your image into a .cur. The demo caps how many files you export at once, and the paid edition lifts that.
For a plain pointer made from a picture, the offline path keeps your image private and gets you a clean multi size cursor. Reach for a cursor editor when the click point has to sit somewhere the default will not put it.
Mistakes That Ruin a Custom Cursor
Most homemade cursors fail for one of a few reasons, and every one is easy to avoid once you know it.
The opaque background is the big one, and it comes from saving over a white or coloured layer. Losing the click point is next, covered above. After those, watch the detail. A photo packed with texture turns to mush at pointer size, so bold shapes win. And check the format, since a flattened JPEG throws the transparency away on the way in, which is why a PNG or SVG source is the safe start.
Fancy a moving pointer rather than a still one? That is a different file, an animated cursor, and it plays a run of frames instead of one image.
Frequently Asked Questions

Written and maintained by Leena Taylor Paul and the Univik team, developers of Windows data conversion and recovery software since 2013. We built cursor export into the ICO Converter after watching people turn a treasured picture into a pointer only to have it click a few pixels off. This guide spends its time on the click point, the detail that decides whether a homemade cursor feels right. Last verified August 2026. Cursor not behaving? Contact our support team.