Moving MailPlus Server to a new Synology NAS has two paths. Method 1 (Migration Wizard): Synology’s built-in migration tool copies the entire NAS DSM configuration, installed packages and data from the old NAS to the new one. Fast, preserves settings, but requires DSM and MailPlus Server version compatibility between source and destination. Method 2 (Fresh Install with MBOX Import): install MailPlus Server fresh on the new NAS, export MBOX files from the old NAS and import them. More work but avoids version conflicts entirely. Regardless of which method you choose, run a full MBOX export from the old NAS before starting if the migration fails, the MBOX backup is the recovery path. Univik Synology MailPlus Converter can convert those backups to PST or PDF independently of the NAS.
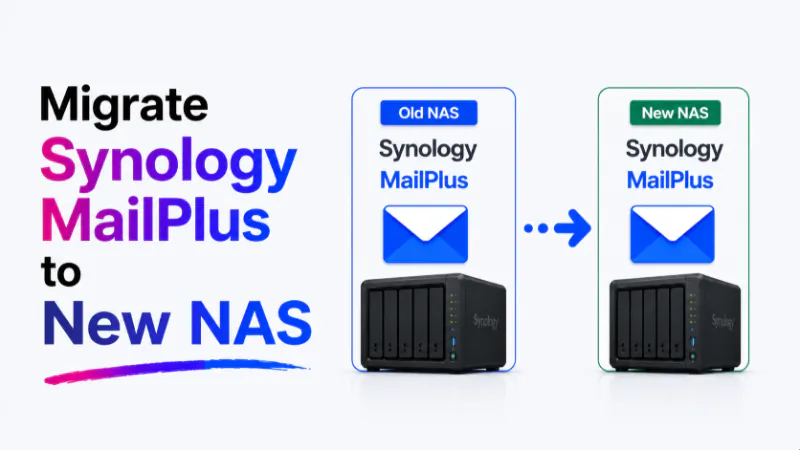
Two Methods to Move MailPlus Server to New Hardware
When replacing a Synology NAS running MailPlus Server, the goal is to keep email running ideally with no interruption to delivery and no data loss. The right method depends on the hardware you are moving to and the DSM and MailPlus Server versions involved.
Both methods end with MailPlus Server running on the new NAS with all historical email accessible. They differ in complexity, risk and how much reconfiguration is needed afterward.
Before Anything Else: Export MBOX as Insurance
Run a complete MBOX export from the old NAS before starting any migration method. This is not optional.
The migration wizard is reliable Synology has refined it across many DSM generations. But hardware migrations involve a window of risk: the old NAS has been partially reconfigured, the new NAS is mid-setup and if something fails in that window, the email data is in an intermediate state. An MBOX backup made before the migration starts means you have a clean, verified copy of every mailbox that exists regardless of what happens next.
For the full export steps including DSM 6 vs DSM 7 differences, see our MailPlus Server export guide. Copy the MBOX files to a Windows machine or external drive not just to another folder on the same NAS. They need to exist independently of the NAS being migrated.
For best practice on storing and maintaining this backup, see our MailPlus Server backup guide.
Method 1: Synology Migration Wizard
Synology’s Migration Assistant tool copies the full contents of a source NAS to a destination NAS DSM settings, packages, configurations and all data. For a MailPlus Server migration where the source and destination run compatible versions, this is the fastest path.
Confirm compatibility before starting. Both NAS devices need to run compatible DSM versions. See the Version Compatibility section below for the specific rules. If the new NAS requires a DSM version significantly newer than the source, consider Method 2 instead or upgrade DSM on the old NAS first and verify MailPlus Server still works before initiating the hardware migration.
Connect both NAS devices to the same network. Migration Assistant transfers data over the local network. Both NAS units need to be on the same subnet. For large email archives, use a wired connection wireless transfer is significantly slower and increases the risk of interruption.
Open Migration Assistant on the new NAS. Log into DSM on the new (destination) NAS. Go to Package Center and open Migration Assistant. Select Migrate from another Synology NAS and choose the source NAS from the network scan. Enter admin credentials for the source NAS when prompted.
Select what to migrate. Migration Assistant gives you control over what to transfer. For a MailPlus Server migration, select All packages and All shared folder data. Deselect content you do not want to carry over for example, Surveillance Station recordings if storage space is a concern.
Run the migration and wait. Migration time depends on total data size and network speed. A NAS with 100 GB of email data typically takes two to four hours over a gigabit wired connection. Do not interrupt the migration once it starts. The old NAS stays online and accessible during migration only the destination NAS is in a transitional state.
Verify MailPlus Server on the new NAS before cutting over. After migration completes, log into the new NAS, open MailPlus Server and confirm that all user accounts are present and email is accessible. Do not update DNS or redirect email delivery until you have verified the new NAS is working correctly.
Update network settings to point mail traffic to the new NAS. Update the static IP assignment or DHCP reservation so the new NAS takes over the IP address previously used by the old NAS. Update any firewall rules that reference the old NAS IP. Email delivery resumes to the new NAS as soon as the IP is live.
What the Wizard Migrates and What It Does Not
| Item | Migration Wizard | Notes |
|---|---|---|
| Email messages and folder structure | ✅ Yes | Full mailbox data transferred including attachments |
| MailPlus Server user accounts | ✅ Yes | All user accounts with their settings |
| MailPlus Server configuration | ✅ Yes | SMTP settings, spam filter rules, domain config, quotas |
| MailPlus Server licences | ✅ Yes | Licences are portable they transfer to the new NAS |
| SSL certificates | ✅ Yes | Existing certificates migrate with the configuration |
| MailPlus high availability cluster config | ⚠️ Partial | HA cluster must be rebuilt after migration to new hardware |
| Package version (MailPlus Server 1.x vs 3.x) | ⚠️ May upgrade | If destination DSM requires a newer MailPlus Server, an upgrade runs after migration see Version Compatibility |
| MailPlus client (webmail) customisation | ✅ Yes | User interface settings and preferences carry over |
Version Compatibility: The Critical Check
This is the part most migration guides skip and the part most likely to cause problems.
MailPlus Server versions are tied to DSM versions. MailPlus Server 1.x and 2.x run on DSM 6. MailPlus Server 3.x and 4.x run on DSM 7. If the old NAS is on DSM 6 and the new NAS ships with DSM 7, the migration wizard copies the email database and then MailPlus Server upgrades itself from the 1.x/2.x format to 3.x format. This upgrade usually completes without issue but it takes time, it must not be interrupted and certain configurations from 1.x do not exist in 3.x and will need to be reconfigured after.
Same DSM version (6 to 6 or 7 to 7): low risk. The migration wizard transfers MailPlus Server to the same version on the new hardware. Email data, settings and configuration transfer cleanly without a version upgrade. This is the simplest scenario.
DSM 6 to DSM 7: moderate complexity. If the new NAS runs DSM 7 and the old NAS runs DSM 6, the migration copies the email data and then MailPlus Server upgrades from 1.x/2.x to 3.x/4.x. Allow at least two hours after migration for the database upgrade to complete. During this time MailPlus Server may be unavailable. Check the MailPlus Server log in DSM for the upgrade completion message before attempting to access email or reconfigure settings.
Features removed between MailPlus Server 2.x and 3.x. After a DSM 6 to DSM 7 migration, the following items need manual reconfiguration: catchall address rules (implementation changed in 3.x), certain SMTP relay configurations, IP block rules for spam filtering and any custom Rspamd rules defined in the old installation. Check each of these after migration and reconfigure in MailPlus Server 3.x before declaring the migration complete. For the full checklist of what changes between versions, see our DSM 6 to DSM 7 email migration guide.
Method 2: Fresh Install With MBOX Import
Method 2 installs MailPlus Server on the new NAS from scratch, then imports email data from the MBOX backup. It avoids version migration entirely because MailPlus Server is installed fresh at the current version on the new hardware.
Use this method when version compatibility is a concern, when the new NAS is a significantly different architecture or when you want a clean slate no legacy configuration, no carried-over settings that may have accumulated over years.
Set up DSM on the new NAS. Install DSM through the Synology Web Assistant. Configure network, shared folders and user accounts. Do not install MailPlus Server yet.
Export MBOX from the old NAS. Run the admin MBOX export as described in the export guide. Copy the export folder to the new NAS or to a Windows machine that both NAS devices can access.
Install and configure MailPlus Server on the new NAS. Install MailPlus Server from Package Center. Add licences. Configure your domain, SMTP settings, user accounts and spam filtering. This is a full configuration from scratch keep the old NAS admin panel open alongside the new one to reference the existing settings.
Import the MBOX data into MailPlus Server on the new NAS. MailPlus Server includes a mail migration tool that can import MBOX data into user accounts. In MailPlus Server admin, go to the migration or import section and point it at the MBOX export folder. The import recreates each account’s email and folder structure on the new installation.
Update network settings and redirect email delivery. Once the import is verified, update network settings to route email to the new NAS. Retire the old NAS after a 30-day verification window.
Which Method to Use
| Situation | Recommended Method |
|---|---|
| Same DSM version, same MailPlus Server version family | Method 1 (Migration Wizard) fast and low risk |
| DSM 6 source to DSM 7 destination | Method 1 with extra time allowed post-migration for database upgrade, OR Method 2 for a clean slate |
| Want to clean up years of accumulated legacy config | Method 2 fresh install removes all configuration debt |
| Time-sensitive migration with minimal downtime | Method 1 wizard is faster than a full reconfiguration |
| NAS being replaced due to hardware failure (not planned) | Method 2 new hardware may require different DSM, fresh install is safer |
After Migration: Verify Before Retiring the Old NAS
Confirm all user accounts are present on the new NAS. In MailPlus Server admin, compare the user account list against the old NAS. Every account active and deactivated should appear. A missing account means the migration did not include that user.
Test email delivery end-to-end. Send a test email to a user account on the new NAS and confirm it arrives. Test SMTP outbound delivery from a user account to an external address. Confirm both inbound and outbound are working before declaring the migration complete.
Verify spam filtering is active. Send a test email with a known spam signature to confirm Rspamd is running and filtering. A migration that completes but leaves spam filtering misconfigured will flood user inboxes within hours.
Keep the old NAS online for 30 days post-migration. Users discovering missing email during the first month after migration can be directed back to the old NAS for recovery. Keep it running but take it off the live mail routing. Retire it only after the 30-day window closes with no reported issues.
Frequently Asked Questions
Are MailPlus Server licences transferable to a new NAS?
Yes. MailPlus Server licences are tied to the Synology account, not to specific hardware. When you migrate to a new NAS and activate MailPlus Server, the licences transfer with the account. You do not need to purchase new licences for the replacement hardware. Confirm this by checking your Synology account licence management before migration licences should show as transferable.
Will the migration wizard work if the new NAS has a different number of drive bays?
Yes. Migration Assistant transfers data over the network, not at the drive level. The number of drive bays, RAID configuration and volume layout on the new NAS does not affect the email data migration. Set up the new NAS storage pools and volumes as required for the new hardware before starting the wizard.
Can I run the migration during business hours or does it require a maintenance window?
Method 1 (Migration Wizard) keeps the old NAS online and running throughout the migration email delivery continues normally. The new NAS is the only system in a transitional state during the migration. Technically you can run it during business hours. However, the network transfer causes some load and the post-migration verification and network cutover require a brief period of attention. A weekend or after-hours window avoids that pressure.
What happens to email that arrives during the migration?
Email continues arriving at the old NAS via its existing IP and MX records throughout the migration. Once the migration completes and you update the network settings to route email to the new NAS, new email arrives there. The email that arrived at the old NAS during the migration is already on the new NAS if Method 1 was used the migration wizard transfers all data including email delivered during the migration window. Confirm this by checking the most recent email timestamps on the new NAS after the cutover.
What if the migration fails midway through?
Stop the migration attempt on the new NAS and check the old NAS for integrity. If the old NAS is still fully operational (it should be it was only the source, not modified during Method 1), restart the migration from the beginning after resolving the cause of failure. This is why the MBOX backup before migration is essential it provides a verified independent copy if the old NAS also develops problems during the migration window.
Conclusion
The migration wizard is the right first choice for most NAS-to-NAS MailPlus Server migrations. It is fast, it preserves all settings and it handles the email data automatically. The version compatibility check is the one step that determines whether the wizard will complete cleanly or require post-migration reconfiguration.
The MBOX export backup before migration is not optional it is the safety net that turns a failed migration from a data loss event into a recoverable situation. Export first, migrate second, verify third, retire the old hardware last.
Is the new NAS running the same major DSM version as the old one or is this a DSM 6 to DSM 7 jump? That single answer determines whether the migration wizard handles everything automatically or whether post-migration reconfiguration is needed.