An ICO and a CUR are the same file wearing different labels, so turning an icon into a cursor keeps every pixel and adds one thing the icon never carried, a click point. The Univik ICO Converter reads your .ico and writes it back out as a .cur in a single step.
You have an icon you like, maybe one you pulled out of a program, and you want it trailing your mouse instead of sitting on a shortcut. An icon is already most of the way to being a cursor, which makes this one of the easier conversions on Windows.
This guide covers what actually changes when an .ico becomes a .cur, why the picture comes across untouched and the single field you have to think about.
An Icon and a Cursor Are the Same File Underneath
Open the two formats side by side and they are near enough identical. Both wrap the same kind of picture data in the same container, a small directory that lists each size followed by the image bytes. According to the ICO format reference, only two things separate them.
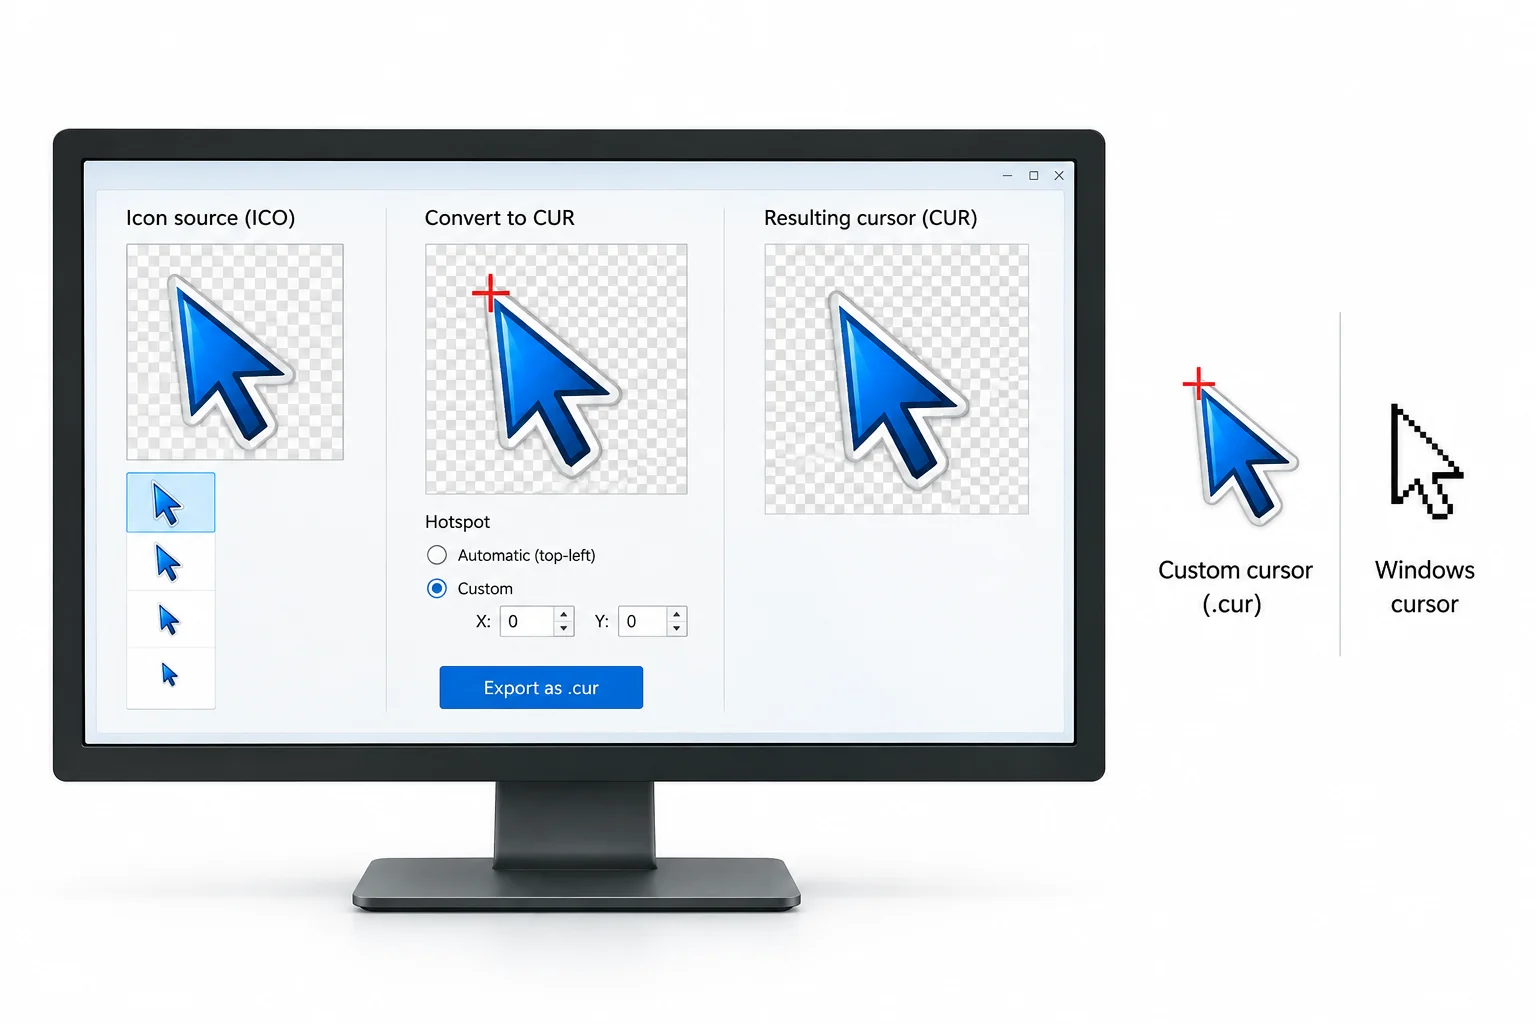
The first is a flag in the header that reads 1 for an icon or 2 for a cursor. The second is the hotspot, a pair of numbers a cursor carries that an icon has no slot for. Clever detail worth knowing, the cursor tucks that hotspot into the exact two fields an icon uses to record its colour planes and bit depth, so nothing new is bolted on. The bytes are simply read a different way.
Two fields hold colour planes and bit depth
Same picture data
Those same two fields hold the hotspot across and down
Same picture data
This is why simply renaming a .ico to .cur falls flat. The picture is right, but the flag inside still announces an icon and there is no hotspot written, so Windows does not treat it as a pointer. A real conversion flips that flag and writes the hotspot in, which is the work the converter does for you. The picture itself travels as it is, whether the icon kept it as a plain bitmap or, for the larger sizes, as compressed PNG, so the cursor shows the same image the icon did.
Your Icon Is Already Cursor Ready
Starting from an icon skips every bit of preparation that starting from a photo demands. An icon arrives square, sits on a clear background and carries its sizes in a single file. That is the exact shopping list a cursor has.
The one thing missing is the click point, since nothing ever clicks an icon. If you are working from a picture rather than an icon file, the cropping and background work lives in the guide on making a cursor from an image. From an icon, you skip straight to the conversion.
Convert the ICO to a CUR
With an icon in hand the conversion is short. The Univik ICO Converter opens the .ico and writes it back out in the cursor format, every size and the transparency carried over.
- Load the iconOpen the converter and drop in your .ico file.
- Set the output to CURChoose the cursor format rather than an image format.
- ExportThe app rewrites the icon as a cursor, marking it as one and keeping the picture exactly as it was.
- Keep the .curYou now have a cursor file, ready for the click point and for Windows.
Not sure it came out right? The free ICO viewer loads a .cur in a browser tab, so you can look over every size at full scale first. Got a folder of icons to turn into pointers? The converter runs them as a batch, so a whole set becomes cursors in one pass rather than one file at a time. The reverse trip, pulling a plain image back out of an icon, is the ICO to PNG route instead.
Open an .ico, switch the output to CUR and export a cursor that keeps every size and the transparency of the original, then point Windows at it.
Free Download See All FeaturesAdd the Click Point the Icon Never Had
An icon has no click point because nothing points with an icon. A cursor lives or dies by one. That single pixel, the hotspot, is the spot Windows follows as the working end of your pointer, and Microsoft's notes on cursors describe it as where a mouse event lands.
A cursor converted from an icon starts with a default click point, dropped in a corner. If your icon points from that corner, the way a classic arrow aims up and to the left, the default fits and you are set. If it points from its middle or an odd spot, you move the pixel in a cursor editor. The deeper story on how the hotspot works and how to place a fussy one sits on the CUR file guide.
Every Size in the Icon Comes Along
A good icon is not one picture. It is a stack of them at 16, 32, 48 and 256 pixels, so Windows always has a clean match for the display. When you convert that icon, the whole stack travels into the cursor.
That matters on a sharp screen, where Windows draws the pointer larger and reaches for the biggest size it can find. An icon that already carries a 256 pixel version hands your cursor a crisp look on a high resolution display with no extra effort.
Point Windows at the New Cursor
Windows does not install a cursor. You hand it the file. Save the .cur somewhere it can stay, open your mouse settings and, under the Pointers tab, browse to the file for whichever pointer you are changing.
Save the pointer as a scheme so your pick holds through a reboot rather than snapping back to the default. The full click by click walkthrough, plus where custom cursors live on disk, sits on the CUR file guide.
When Turning an Icon into a Cursor Makes Sense
This is a cosmetic job, not a fix for anything, and that is the point. A few reasons people reach for it.
- A branded pointer. Turn your app or company icon into the cursor for a demo, a kiosk or a themed desktop so the pointer matches the rest of the look.
- A matching set. If you have built a set of icons, converting one into the pointer ties the whole theme together.
- Reusing an icon you already pulled. An icon extracted from a program can live a second life as a cursor rather than sitting unused in a folder.
None of these change how the mouse behaves. They change how it looks, which for a personal desktop or a branded machine is the whole reason to bother.
What an ICO to CUR Cannot Do
The conversion is honest about its edges, and knowing them saves a wrong turn.
A converted cursor stays still. For a pointer that moves you need an animated cursor, which plays a run of frames rather than showing one. The conversion also cannot guess a click point for a complicated shape, so anything not pointing from a corner still needs the hotspot set by hand. And an icon lifted from someone else's program is their artwork, so using it as your own pointer is fine while shipping it is a rights question worth reading first.
Frequently Asked Questions

Written and maintained by Leena Taylor Paul and the Univik team, developers of Windows data conversion and recovery software since 2013. Cursor export shares the same reader that opens icons, which is what let us keep the picture byte for byte on the way to CUR, so this guide leans on that twin relationship rather than treating the two as separate jobs. Last verified August 2026. Stuck on a conversion? Contact our support team.