SQL Server records enough to answer who removed data, when and with which command. The transaction log ties each operation to a login through its Transaction SID, the default trace stores dropped object events with the login and machine name, and the MDF file itself still holds traces of removed rows. Work on copies rather than the live database, and use Univik SQL Database Recovery to examine a copied file off the server.
Data is missing from a SQL Server database and nobody admits to touching it. Before anything gets restored, three questions need answers, which command removed it, who ran that command and when. SQL Server keeps more evidence than most people expect, in the transaction log, in the default trace and in the database file itself. We examine SQL Server files for exactly these answers in our recovery work, and the order you look in decides how much of the trail is still there when you arrive. This page walks the evidence in that order.
What SQL Server Forensic Analysis Answers
For an evidence-grade view, a SQL log analyzer turns the transaction log into a court-ready forensic report.
Forensic analysis of a SQL Server database is the reconstruction of what happened from the traces left behind. In practice it answers four things. Which operation ran, since DELETE, TRUNCATE and DROP each leave a different signature. When it ran, down to the transaction’s begin time. Who ran it, as far as the login can be tied to a person. And what exactly was removed, which rows or which objects.
The same discipline serves different stakes. Inside a team it settles whether the Tuesday data loss was the cleanup script or a person. In a dispute or an investigation it has to do more, the findings must be documented well enough that someone else can retrace them, which changes how you handle the evidence from the first minute. Recovery of the data itself is a separate job from any of this, and it comes after, because the act of recovering can overwrite the very traces that answer who and when.

“Forensic work on SQL Server data starts with reading the files without changing them, and that is how our lab reads MDF, NDF, LDF and BAK: in separate environments per version, on Windows 10 and Windows 11, against databases we know the contents of.”
Nick Rogers
|Founder, Univik, building file conversion tools since 2013
Preserve the Evidence Before You Probe
The first move in any examination is to stop the evidence from changing, and on a live SQL Server that is harder than it sounds. The transaction log keeps writing, the default trace keeps rolling over and every query you run adds activity on top of the trail you are reading. The working rule is simple, examine copies, not the live system. And resist the urge to restart the server, a live SQL Server holds volatile evidence, recently touched pages still in memory, active sessions and the text of recently executed statements in the plan cache, and a restart wipes that whole layer at once.
Copy what holds the evidence. Take a backup of the transaction log before anything truncates it, and copy the MDF and LDF files, along with any NDF secondary files beside them, if the database can be taken offline for a moment. Copy the default trace files out of the log directory too, before they roll away. From there the examination runs on the copies, on a separate machine where nothing is writing, while the production system goes back to work. A copied MDF can be read without any SQL Server at all, the approach behind opening an MDF without SQL Server, which keeps the examination fully separated from the live environment.
Where the evidence is acquired from is its own discipline. In formal digital forensics the database files are pulled not from a running server but from a forensic image of the disk. That image might be a dd file, an E01 expert witness file or a VMDK from a virtual machine, so the original media is never mounted or altered. On a live server there are two honest options. Stop the SQL Server service and copy the files, which is clean but takes the database offline, or read from the physical disk while the service runs, which avoids downtime but has to account for activity in flight. Each is a read only acquisition, and which one fits depends on whether downtime or completeness matters more for the case.
One caveat sits underneath all of it, and it is worth stating as theory. SQL Server writes to the log before it writes to the data file, so a row that is committed in the log may not yet have reached the MDF at the moment a copy is taken. An examiner reading only the data file could see that row as missing when it was never lost, which is exactly why the log and the file are read together rather than either alone.
DELETE, TRUNCATE or DROP, Telling Which One Ran
The three commands that remove data behave differently under the hood, and those differences are the fingerprint. A DELETE removes rows one at a time and the transaction log records every removed row individually, so a DELETE leaves the richest trail, row level records naming the table they came from. A TRUNCATE empties the table by freeing its pages and logs the page deallocations rather than each row, a much thinner trail with its own transaction name. A DROP removes the object itself, and it shows in the log as a DROPOBJ transaction alongside the system table changes that erased the table’s definition.
One caveat is worth knowing before you search. A DROP executed within an explicit transaction appears under a generic user transaction name rather than DROPOBJ, so an empty DROPOBJ search does not clear the suspects, it just means the search widens to the system table changes themselves. Getting the removed data back is a different job for each command, deleted rows are the territory of our recovering deleted records guide, and a removed table is covered in recovering a dropped table.
Reading the Transaction Log for Who and When
The transaction log ties every operation to a transaction, and every transaction to the security identifier of the login that ran it. That chain is what turns a missing table into a name and a timestamp, and it reads out in four steps.
- Query the log with fn_dblog and filter to the operation you established above, the LOP_DELETE_ROWS row removal records for a DELETE or the DROPOBJ transaction for a DROP, and note the Transaction ID.
- Query the same log for that Transaction ID’s begin record, which carries the transaction’s start time.
- Read the Transaction SID from that begin record, the security identifier of the login that ran the command.
- Pass the SID to SUSER_SNAME, which returns the login name behind it.
fn_dblog is undocumented but has served this purpose for years, and it reads the active portion of the log, so it works while the relevant records are still there. Its sibling fn_dump_dblog reads transaction log backups instead, which extends the reach to history that has already left the active log, provided log backups exist. There is also a trace flag, 2537, that widens fn_dblog’s view beyond the active portion. All of it is log reading for attribution, and reading the log to rebuild lost data is a different exercise, covered in our guide to recovering a SQL database without a backup.
The Default Trace and What it Remembers
SQL Server runs a lightweight trace by default, and it happens to record exactly the events an examination wants. Object deleted, object created and object altered events land in the default trace with the database name, the object name, the login name, the machine it came from and the application that sent the command, stamped with the time. For a dropped table this is the fastest answer available, the Schema Changes History report inside SQL Server Management Studio is built on this same trace and lays the changes out ready made.
The catch is retention. The default trace writes files of 20MB and keeps five of them, rolling the oldest away as new activity arrives, so on a busy server the window can be short, hours rather than weeks. That is why the trace files are among the first things to copy out when something happens, and why the transaction log route exists for everything the trace has already lost.
Where the Forensic Trail Runs Cold
Honest examination means knowing where the evidence stops. The transaction log route needs the relevant records to still exist, and a log that has been backed up and truncated, or a database on the simple recovery model recycling its log space, can have already let them go. The default trace rolls over on its own schedule. And the SID chain has a human limit, it identifies the login, not the person, so a server where everyone connects as sa or through one shared service account gives you a name that answers nothing. Attribution is only as good as the login separation that was in place before the incident.
None of those dead ends erases everything. The database file itself is the one piece of evidence that does not roll over, and what it holds is the next stop.
Examining the MDF File Itself
Removed rows do not vanish from the MDF the instant a command runs, they sit in pages the server has marked reusable until new writes claim the space. A tool that reads the file directly can surface those traces. Univik SQL Database Recovery scans a copied MDF on Windows, shows removed rows alongside the live data and works with no SQL Server attached, so the examination runs on an isolated machine without touching production. The free MDF Viewer opens the copy read only for a first look before anything else runs.
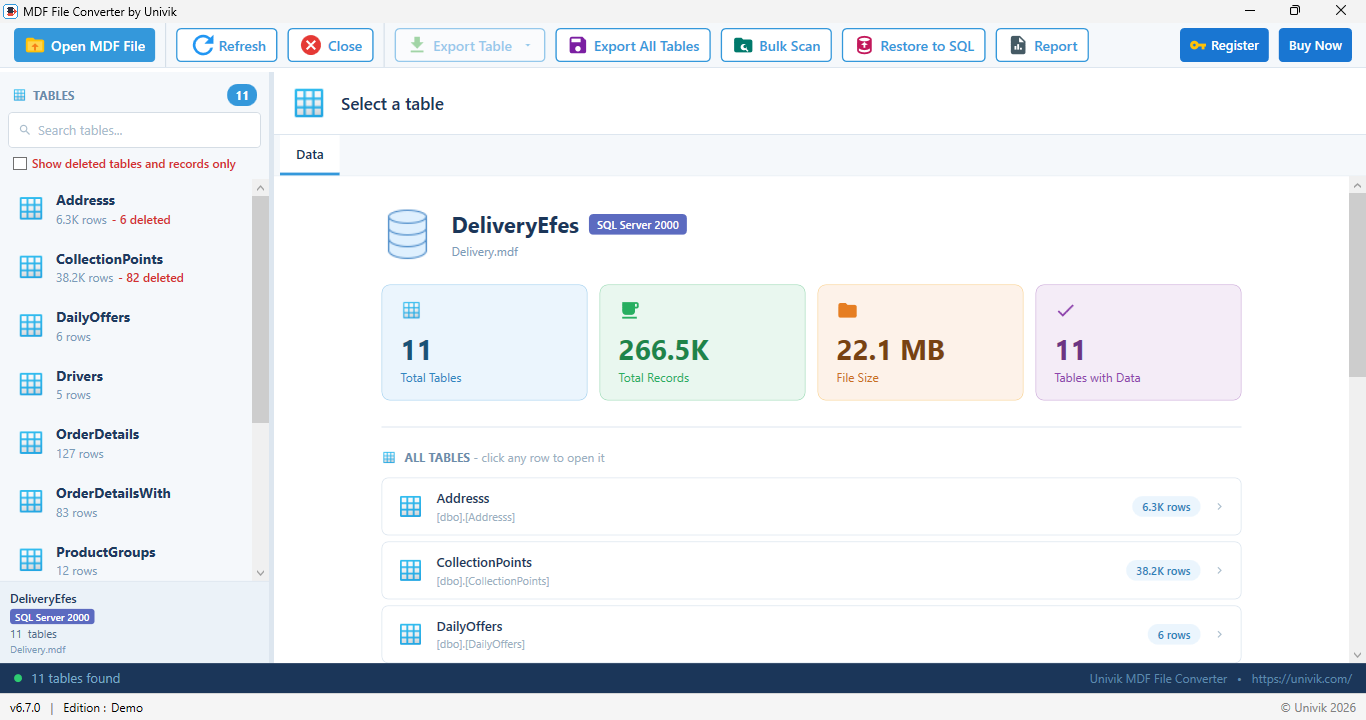
It helps to know what a direct read actually does, because the mechanics are what make it evidence safe. An MDF is built of pages, each carrying its own identity inside the file, and a reader walks those pages to rebuild the tables first and the objects around them after. Everything it produces is a fresh output, a script or a new set of files, and the source file is never written to at any point. The copy you examine today reads byte for byte the same next month, which is exactly what a finding that might be challenged later needs.
This is also the route that works when the log route cannot. A file whose log has long since turned over still carries its pages, and a copied file with no LDF beside it can still be read, the situation covered in opening an MDF without the LDF. What the file shows depends on how much was overwritten after the removal, which is one more reason copies get taken early.
It also helps to know the map. Inside the file, a small set of structures carries everything an examination cares about, and each one holds a different piece of the story.
Examine the file, not the live server
Univik SQL Database Recovery reads a copied MDF on an isolated Windows machine, surfaces removed rows next to the live data and needs no SQL Server at all, so the evidence stays exactly as it was found.
Inside an MDF Page, the Forensic View
An MDF is a sequence of 8KB pages, and an examiner reads them at a lower level than any query does. Every page opens with a header that records its type, the object it belongs to and its place in the allocation chain, and that type is the first thing to read. Data pages hold the rows, index pages hold the b tree structures, and a family of allocation pages tracks which space is used and which is free.
The forensic detail lives below the row. Each data page carries a slot array that points to where every row sits, and when a row is deleted its slot can be released while the bytes stay on the page, sitting in what is effectively slack space until something overwrites them. Reading the column offsets directly, rather than asking SQL Server to hand back a tidy result, is what lets an examiner recover a row the engine already considers gone. This is the level a carving pass works at, walking the page bytes for record patterns the slot array no longer points to.
Rebuilding Table Structure From the System Catalog
Rows without their structure are just bytes, so an examination that has lost the schema must rebuild it before it can read the data, and that structure lives in the system catalog. Three base tables carry most of it, sysschobjs holds the objects themselves, syscolpars holds the columns and their types, and sysrowsets ties an object to the physical storage that holds its rows. Read together they turn a raw page into named columns with known types.
The link from a table to its pages runs through allocation units and partition IDs, which point to the IAM chain that lists every page the object owns. When a DROP has erased a table’s catalog rows, this is the structure that is damaged, and reconstructing it from what survives in the catalog and the allocation maps is what makes recovering a dropped object possible at all. It is also why a file read that understands the catalog recovers more than one that only carves loose rows, the catalog is what gives the rows their meaning back.
Transaction Log Internals for Reconstruction
The transaction log has its own internal shape, and reading it for reconstruction means reading below the level fn_dblog presents. The log is divided into virtual log files, and inside those into log blocks, each block opening with a header that records its size and the first log sequence number it carries. That log sequence number, the LSN, is the thread that runs through everything. Every change carries one, and they only ever move forward.
Reconstruction is the act of ordering these by their LSN. Walk the sequence forward and you replay what happened in the order it happened, a change at a time. Walk it backward from a known point and you trace one row’s history to the moment it was inserted. Correlating a log entry with the physical row it touched, matching the operation to the page and slot it names, is what turns a pile of log records into a timeline of who changed what and when. The dedicated forensic tools that read these structures exist because fn_dblog stops at the active log and does not expose this depth, and the discipline itself rests on published academic research into these formats rather than on any single vendor’s word.
What These Investigations Look Like in Practice
The three scenarios below are composites, illustrative cases built from the patterns that recur in this kind of work rather than any single named client. Details have been generalized on purpose. They show how the evidence stores on this page combine into an answer, and where each one reaches its limit.
Across all three, the same rule holds. The answer came from evidence that was still there because it was preserved early, and each case names its own limit rather than claiming more than the traces support.
Making Forensic Findings Hold Up
An answer that convinces you is not automatically an answer that convinces anyone else, and the gap between the two is documentation. Record where each piece of evidence came from and when it was copied, the log backup, the trace files, the MDF copy. Keep the raw outputs, the log records with their transaction IDs and timestamps, the trace rows with login and machine names, rather than only your conclusions from them. And note what could not be established, a shared login, a rolled over trace, a truncated log, because stating the limits is part of what makes the rest credible.
The strongest position is the one built before anything happens, separate logins per person, log backups that keep history reachable and trace files that get archived rather than lost. An examination can only read the evidence that was kept, and the keeping is decided long before the question is asked.
Frequently Asked Questions
How do I Find Out Who Deleted Data in SQL Server?
Through the transaction log. Each DELETE is logged under a transaction, the transaction’s begin record carries the Transaction SID of the login that ran it, and SUSER_SNAME turns that SID into the login name, with the begin time giving you when. The default trace does not record row deletes, so the log is the route for DELETE.
How do I Find Out Who Dropped a Table in SQL Server?
Two places. The default trace records object deleted events with the login name, machine and time, readable through Management Studio’s Schema Changes History report, and it is the fastest answer while the trace still holds the event. The transaction log records the DROP as a DROPOBJ transaction tied to a SID, which works after the trace has rolled over.
Can I Tell Whether a Table was Truncated or Deleted?
Yes, the log signatures differ. A DELETE leaves one log record per removed row, each naming the table, while a TRUNCATE logs page deallocations under its own transaction name with no per row records. An emptied table with no row removal records in the log points at TRUNCATE, and a missing table entirely points at DROP.
Does fn_dblog Show Who Ran a Command?
Indirectly, and that is enough. fn_dblog exposes each transaction’s begin record, which carries the Transaction SID of the login behind it, and passing that SID to SUSER_SNAME returns the login name. It reads the active portion of the log, and its sibling fn_dump_dblog reads transaction log backups for history that has already aged out.
What if Everyone Logs in with the Same Account?
Then the trail ends at the account. The SID chain identifies the login that ran the command, not the person at the keyboard, so a shared sa or service account gives every user the same identity. The default trace adds the machine name and application, which can narrow it down, but real attribution needs separate logins set up in advance.
How Long the Default Trace Keeps its History?
Until it rolls over, which depends entirely on server activity. The default trace writes 20MB files and keeps five, discarding the oldest as new events arrive, so a quiet server may hold weeks and a busy one only hours. Copying the trace files out as soon as something happens is how you make sure of keeping them.