 Email Migration Guide
 By
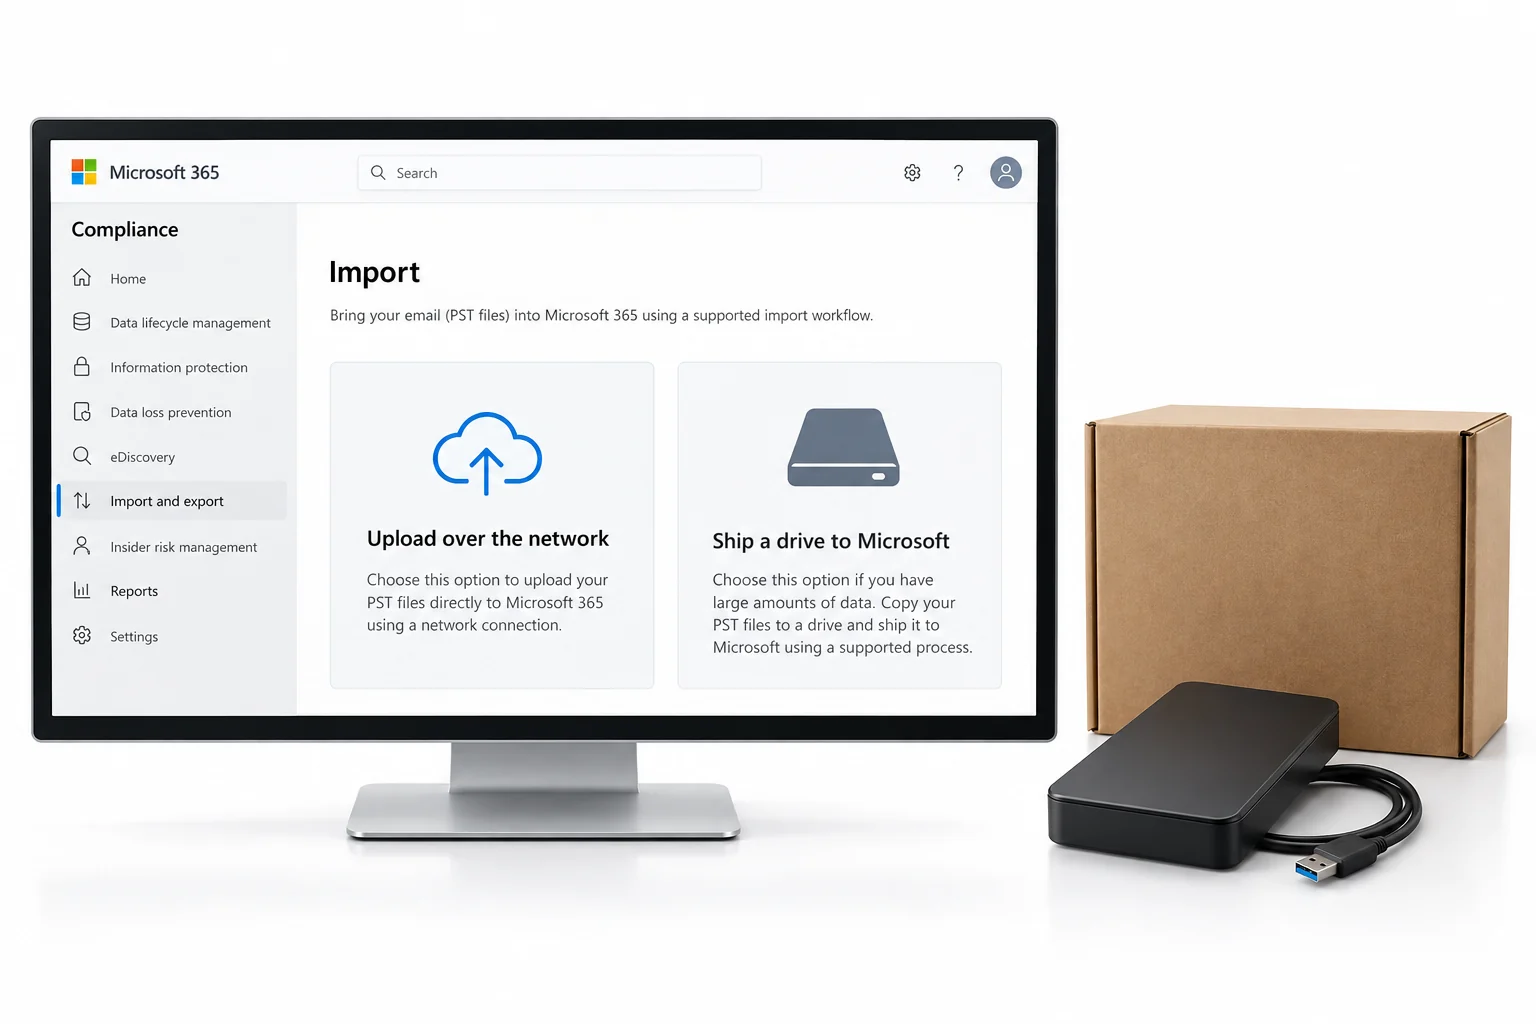
By To import PST to Office 365, open the Microsoft Purview portal, go to Data lifecycle management, then Microsoft 365, then Import. Create a New import job. Pick network upload for most jobs: copy the SAS URL, upload PST files to Office 365 storage with AzCopy, then submit a mapping CSV that pairs each PST with a mailbox. Pick drive shipping only for very large data on a slow line. The Import service takes PST files only and each should be under 20 GB. If your old archive handed you EML or MSG files, turn them into PST with Univik Email Archive Converter first.
You have a stack of PST files. Maybe they came from staff who left, from an old Exchange server or from an archive platform you are leaving. Office 365 will take them, but only through the Import service and only as PST. Whether you import PST files for three leavers or three hundred mailboxes, the route is the same. This guide walks through both routes with the screens you will see, the mapping file that trips most people up and the rules that decide whether the job runs in a day or stalls for a week.
- Before you import
- Network upload in 6 steps
- Step 1: Open Import in Purview
- Step 2: Name the job, choose upload
- Step 3: Copy the SAS URL, get AzCopy
- Step 4: Upload the PST files
- Step 5: Submit the mapping file
- Step 6: Filter and import the PST data
- Drive shipping, when and how
- The mapping file explained
- One small PST? Use Outlook instead
- When you have EML or MSG, not PST
- After the import
- Office 365 PST Import Questions
Before You Import PST to Office 365
Pick the card that matches your situation. It jumps you to the route that fits.
- The right rolesMailbox Import Export and Mail Recipients in Exchange Online, or a Global Administrator account. Assign the first one in the Exchange admin center under Roles and then Admin roles, or with
New-ManagementRoleAssignmentin PowerShell. Without it the Import page stays greyed out. - PST files under 20 GB with unique namesMicrosoft's own limit for smooth processing. Two files called archive.pst in different folders will collide, so rename them.
- A list of PST to mailbox pairsWhich PST belongs to which user, and whether it goes to the main mailbox or the archive mailbox. This becomes the mapping CSV.
- Target mailboxes that existThe Import service cannot create users. Licence and create the mailbox first, including for ex-staff you want to keep as shared or inactive mailboxes.
- Import service
- The Microsoft 365 feature, inside the Purview portal, that bulk loads PST files into Exchange Online mailboxes. It has two intake routes: network upload and drive shipping.
- SAS URL
- A web address with a built-in access key that points at your tenant's private Azure storage. Anyone with it can upload to your import area, so treat it like a password.
- AzCopy
- Microsoft's command line copy tool. You download the exact version linked on the Import page and run one command to push the PST files up.
- Mapping file
- A CSV with one row per PST that tells the service which mailbox each file belongs to. Up to 500 rows per file.
- Retention hold
- A mailbox setting the Import service switches on so retention policies do not delete the freshly imported mail. It stays on until you turn it off.
Import PST to Office 365 by Network Upload in 6 Steps
Network upload is free, needs no hardware and suits most jobs. To import PST files this way you do Steps 1 and 3 once per tenant. Steps 2, 4, 5 and 6 repeat for every batch of PST files.
Open the Import page in the Purview portal
Sign in to the Microsoft Purview portal with the account that holds the Mailbox Import Export role. Open Data lifecycle management, then Microsoft 365, then Import. The page lists every import job the tenant has run with its status. Click New import job.
You should seethe New import job button active. If it is greyed out, the role is missing. Role changes can take up to an hour to apply.
| Name | Type | Status | Created | Created by |
|---|---|---|---|---|
| leavers-q2-2026 | Network upload | Complete | 2026-07-14 | admin@contoso.com |
| archive-batch-01 | Network upload | Complete | 2026-08-02 | admin@contoso.com |
| archive-batch-02 | Network upload | Analysis in progress | 2026-09-05 | admin@contoso.com |
| journal-2019-2021 | Drive shipping | Waiting for tracking number | 2026-09-04 | admin@contoso.com |
The Import page under Data lifecycle management. The red outline marks New import job.
Name the PST import job and choose Upload your data
Give the PST import job a short lowercase name with no spaces, such as archive-batch-03. On the Do you want to upload or ship data? page pick Upload your data. The other option, shipping hard drives, is covered in section 3.
Each PST file should be no larger than 20 GB. Larger files can slow the import.
The upload or ship choice for a PST import job. Upload your data is the default for network upload.
Copy the SAS URL and download AzCopy
The Import data page lists the upload steps. Click Show network upload SAS URL, then Copy to clipboard, and paste it somewhere safe. This URL is unique to your tenant and anyone holding it can write to your import storage. Then click Download Azure AzCopy. Use this exact copy of AzCopy. Microsoft does not support other versions for the Import service. It is a single .exe with nothing to install.
You should seea long URL that starts with https and contains ingestiondata. Leave the two checkboxes at the bottom unticked until your files are uploaded.
Import data page. Two outlined controls: the SAS URL and the AzCopy download. Next stays disabled until both boxes are ticked.
Upload the PST files with AzCopy
This is the step that uploads PST files to Office 365. On a Windows PC or server that can see the PST folder, open a command prompt in the folder where you saved azcopy.exe and run one command. The source is the folder holding the PST files. The destination is the SAS URL in quotes.
azcopy.exe copy "\\FILESERVER1\PSTs" "https://3c3e...blob.core.windows.net/ingestiondata?sv=...&sig=..."Subfolders are copied too, because --recursive is on by default. If you want the files in their own subfolder in Azure, add it after ingestiondata in the SAS URL, for example ingestiondata/batch03. Note the exact spelling. You will need the same case later in the mapping file. When AzCopy finishes it prints a summary with the number of files transferred and any failures. Go back to the portal and tick I'm done uploading my files and I have access to the mapping file.
You should seeNumber of File Transfers Completed equal to the number of PST files, and Number of File Transfers Failed at 0. If a transfer failed, run the same command again. AzCopy skips files already there. To see the uploaded files with your own eyes, open the same SAS URL in Azure Storage Explorer (a free Microsoft tool) and browse the ingestiondata container.
AzCopy summary for a 12 file batch. Completed 12, Failed 0 is the line to check.
Submit and validate the mapping file
Click Next and on the Select mapping file page upload the CSV that tells the service where to import PST data. Click Validate. The file name turns green when every row passes. If it turns red, click View log, fix the rows it names and upload again. Section 4 explains every column. The two mistakes that cause nearly all validation errors are a file name whose case does not match the uploaded file and a mailbox address that does not exist yet. A third is Excel itself: some regional settings save the CSV with semicolons, so open the file in Notepad and check the separators are commas before you upload.
| Workload | FilePath | Name | Mailbox | IsArchive | TargetRootFolder |
|---|---|---|---|---|---|
| Exchange | batch03 | annb.pst | annb@contoso.com | FALSE | / |
| Exchange | batch03 | annb-archive.pst | annb@contoso.com | TRUE | / |
| Exchange | batch03 | tonyk.pst | tonyk@contoso.com | FALSE | /ImportedPst |
| Exchange | batch03 | journal-2021.pst | journal@contoso.com | FALSE |
4 rows, 0 errors. A mapping file can contain up to 500 rows.
A validated mapping file. FilePath matches the subfolder used in the SAS URL, Name matches each PST exactly.
Let the analysis run, then filter and import the PST data
Review the job and save it. The status changes to Analysis in progress while Microsoft scans the PST files for age, item type and size. When it reads Analysis completed, open the job. You get a choice: import everything, or open Filter your data to drop items older than a date or skip categories such as junk. Click Import to Microsoft 365. This is the moment Office 365 imports the PST data into each mailbox. Progress shows per file, and the job ends at Complete.
You should seethe imported folders in each user's mailbox under the TargetRootFolder you set, or in a folder called Imported when you left that column blank. That is a finished import PST to Office 365 job.
| PST files | Mailboxes | Items | Size | Oldest item | Items over 150 MB |
|---|---|---|---|---|---|
| 12 | 9 | 418,236 | 129.1 GB | 2014-03-11 | 0 |
Retention hold will be turned on for each target mailbox when the import starts. PST files in Azure Storage are deleted 30 days after the most recent import job was created.
Analysis completed. Import every PST as is, or filter by date and item type before Office 365 takes the data.
Drive Shipping to Office 365, When and How
Drive shipping to Office 365 exists for one case: you need to import PST files measured in terabytes, more data than your line can push in a reasonable time. A 2 TB archive on a 50 Mbps upload takes about four days of non-stop transfer. At 10 TB and above, or from a site with a poor connection, a disk in a courier box wins. Microsoft charges a per gigabyte fee for the service and you supply the drive and the courier account.
- Create the job and pick Ship hard drivesSame wizard as Step 2 above, second option. Download WAImportExport.exe from the job page. The PST files go on the drive instead of over the wire, but the import job in Office 365 is the same.
- Prepare the driveRun
WAImportExport.exe PrepImportwith a journal file name, the drive letter, a session name, the PST source folder and/encrypt. It formats, encrypts and copies in one go. Repeat without the drive letter and encrypt switches to add more folders to the same drive. - Upload the journal files and shipAdd one journal file per drive in the wizard and validate. Pack the bare drive in an anti-static bag without the SATA to USB adapter. Put "Microsoft 365 Import Service" in the address line.
- Enter the tracking numberInside 14 days, or the job expires and you start again. Then submit the mapping file when the portal asks for it.
The /dstdir: value you gave WAImportExport becomes the FilePath column in the mapping file, and it is case sensitive. ingestiondata/FILESERVER01/PSTs on the drive means FilePath must read FILESERVER01/PSTs, not fileserver01/psts.
The PST Mapping File Explained
The Office 365 PST mapping file is a plain CSV with a header row and one row per PST. Microsoft publishes a sample you can download from the wizard. The columns below are the ones that matter for mail. The three SharePoint columns stay blank.
| Column | Required | What to put | Traps |
|---|---|---|---|
| Workload | Yes | Exchange | Always Exchange for PST |
| FilePath | If used | The subfolder you added after ingestiondata, or blank | Case sensitive. Blank if you uploaded to the root |
| Name | Yes | The PST file name, for example annb.pst | Case sensitive. Must be unique across the job |
| Mailbox | Yes | The user's email address, or the mailbox GUID for inactive mailboxes | The mailbox must already exist |
| IsArchive | Optional | FALSE for the main mailbox, TRUE for the archive mailbox | TRUE needs the archive enabled and has a 100 GB per import limit |
| TargetRootFolder | Optional | Blank, / or /FolderName | Blank creates an Imported folder. / merges Inbox into Inbox and so on |
| ContentCodePage | Optional | A code page number such as 932 | Only for ANSI PST files from Chinese, Japanese or Korean systems |
Two practical habits save hours on every PST import to Office 365. Keep one mapping file per batch and name it after the job. Test with a two row file first, so a column mistake shows up on two PSTs rather than two hundred.
One Small PST? Import It into Office 365 with Outlook Instead
The Import service is built for admins and batches. If you are one person with one PST from an old computer, Outlook does the job without any of the above. Open Outlook signed in to your Office 365 account, go to File, Open & Export, Import/Export, pick Import from another program or file, then Outlook Data File (.pst), browse to the file and choose the mailbox as the destination. Outlook uploads the items to the cloud mailbox in the background. It is slow for anything over a few gigabytes and it counts against the mailbox quota, so it suits a personal archive, not a company migration.
The Outlook route imports into the mailbox that Outlook is signed in to, so an admin cannot use it to fill another user's mailbox without signing in as that user. For more than a handful of PST files, go back to the Import service.
When Your Archive Gave You EML or MSG, Not PST
This is the wall many migrations hit. You leave Mimecast, Proofpoint, Arctera or an on-premises archive and the export is thousands of loose .eml or .msg files, sometimes with an EDRM XML file next to them. Enterprise Vault and Google Vault hand you PST, but with their own problems, covered in migrating Enterprise Vault to Office 365 and Google Vault to Office 365 migration. The Office 365 Import service does not read them. A Microsoft forum thread sums it up: a company with 200 GB of .eml from an online archive asked how to get it into Office 365 and the answer was convert to PST first, keep each file under 20 GB and batch them.
- Open the export folder in Univik Email Archive ConverterUse Add Folder on the unzipped export. The tool walks every subfolder, picks up each EML and MSG file and keeps the folder names, which usually map to users or dates.
- Pick PST and set the split sizeChoose Outlook PST as the output and set the split size below 20 GB, so every file meets Microsoft's limit without a second tool. Folder structure, headers, dates and attachments carry across.
- Name the PST files for the mapping fileOne PST per mailbox named after the user, such as annb.pst, makes the mapping CSV a copy and paste job. Journal exports become one PST for the journal mailbox.
- Open one PST in Outlook, then uploadConfirm folders and attachments look right, then go back to Step 4 above and run AzCopy on the new folder.
The converter runs offline on your PC, so archive data never leaves your network before it goes to Microsoft. It reads exports from Mimecast archive exports, Proofpoint archive exports, Enterprise Vault PST exports, Google Vault MBOX exports and other platforms. For plain folders of loose files, the single-format EML converter and MSG converter do the same PST job; the step-by-step guides are convert EML to PST and convert MSG to PST. For the Arctera and Veritas eDiscovery case, see how to export Arctera eDiscovery email to PST.
Univik Email Archive Converter reads EML, MSG and archive export folders, keeps every folder and attachment and writes Unicode PST files at the size limit you set. Try it on one folder first.
Windows 11 / 10 · nothing leaves your network · the free trial writes a sample PST you can open in Outlook before you buy
After the Office 365 PST Import
Three things happen behind the scenes after a PST import to Office 365 that are worth knowing before users start asking questions.
Set-Mailbox -RetentionHoldEnabled $false or give it an end date with -EndDateForRetentionHold.- The job shows Complete and the report lists zero failed files
- Each user sees the imported folders in Outlook or Outlook on the web, under the folder you chose
- Item counts in the largest folders match what the analysis summary reported
Fix Common Office 365 PST Import Problems
Three things stop most attempts to import PST to Office 365. Match the symptom in the red box, then apply the paired fix.
Do this: Compare Name and FilePath against the Azure listing letter for letter. Case must match. Then check that every Mailbox address exists in the tenant and is licensed.
Do this: The file is over 20 GB. Split the PST in Outlook by moving folders to a second file, or re-run your converter with a split size set, then create a fresh job for the parts.
Do this: The tracking number was not entered within 14 days. Create a new job and reuse the prepared drive and journal file. Enter the tracking number the day you ship.
Stuck on the conversion side, with EML or MSG folders that will not turn into clean PST files? Zip a dozen messages from the export and send them to our support team with the source platform name. We will tell you which route fits before you buy anything.
Office 365 PST Import Questions
 About This Guide
Written and maintained by Leena Taylor Paul and the Univik team, developers of Windows data conversion and recovery software since 2013. The Import service steps, limits and mapping columns in this guide were checked against Microsoft's current documentation. Last verified September 6, 2026. Need a hand? Contact our support team.
Sources checked: Microsoft Learn, Overview of importing PST files · Microsoft Learn, Use network upload to import PST files · Microsoft Learn, Use drive shipping to import PST files · Microsoft Q&A, Import legacy email archive into Office 365